Losing a tooth can feel like a scene straight out of a slapstick comedy. One moment you’re munching on popcorn, and the next, you’re left with a gap that’s perfect for a game of peek-a-boo. But don’t fret! Crafting a dental flipper at home is easier than you might think. With a few simple materials and a dash of creativity, you can whip up a temporary solution that’ll have you smiling again in no time.
Understanding Dental Flippers
Dental flippers provide a temporary solution for missing teeth. They’re an accessible option for anyone looking to restore their smile.
What Is a Dental Flipper?
A dental flipper is a removable prosthetic device that replaces one or more missing teeth. Typically made from acrylic, it includes a base that fits comfortably over the gums. Dentists often prescribe flippers after tooth extraction or while waiting for permanent solutions, like implants. They can function similarly to partial dentures but serve as a more affordable and immediate alternative.
Benefits of Using a Dental Flipper
Using a dental flipper offers several benefits. First, they enhance appearance by filling gaps left by missing teeth. A flipper can improve confidence and the ability to smile freely. Second, they assist with chewing and speaking, making everyday activities easier. Lastly, flippers require minimal maintenance, making them user-friendly for those who want a quick fix. Their easy replacement process allows for adjustments as dental needs change.
Materials Needed
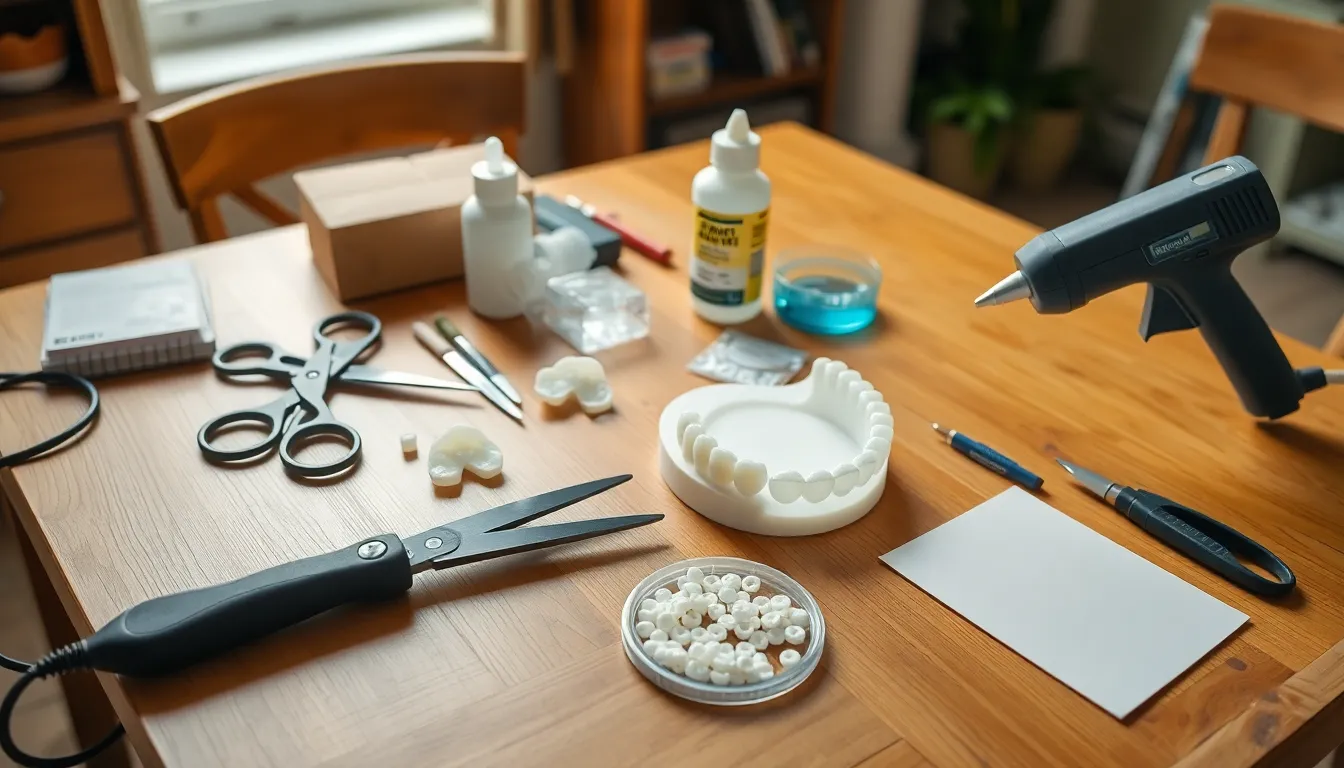
Creating a dental flipper at home requires various tools and materials. Having the right items ensures a smoother crafting process and better end results.
Essential Tools
- Scissors: Use scissors to trim the acrylic or thermoplastic material precisely.
- Heat source: A heat source, such as a hot water bowl or heat gun, softens the thermoplastic for molding.
- Mixing bowl: A mixing bowl holds materials for adjustments during the process.
- Measuring spoon: A measuring spoon ensures accurate ratios when mixing any substances.
- Tweezers: Tweezers assist in positioning and placing components accurately during assembly.
Recommended Materials
- Thermoplastic beads: Thermoplastic beads mold easily when heated, perfect for creating a dental flipper base.
- Acrylic resin: Acrylic resin provides durability and comfort, making it a common choice for flipper construction.
- Dental impression material: This material captures gum contours, ensuring a snug fit.
- Mouthguard material: Flexible mouthguard material can serve as a base to support the flipper design.
- Adhesive: Use dental adhesive to hold components together securely.
Step-by-Step Guide
The process of making a dental flipper at home involves careful preparation and attention to detail. Following these steps ensures a functional and comfortable result.
Preparing the Mold
Begin by gathering dental impression material and a mixing bowl. Measure the appropriate amount of the impression material according to package instructions. Afterward, combine the components to form a smooth paste. Fill a tray with this mixture, and press it firmly against the area where the missing tooth was located. Allow it to set according to the instructions until solidified. Once it hardens, carefully remove the mold. Inspect the mold for accuracy, as this will ensure a proper fit for the dental flipper.
Creating the Flipper
Next, gather thermoplastic beads and a heat source. Fill a bowl with hot water and place the thermoplastic beads in it. Wait until the beads soften and become pliable. Remove them from the water, and shape them using the prepared mold as a guide. For added durability, consider incorporating acrylic resin during the molding process. Once the desired shape is achieved, allow it to cool and harden completely. Carefully trim any excess material for a clean, polished look.
Adjusting for Comfort
Start by placing the flipper in the mouth to test the fit. Identify any areas that cause discomfort or pressure. Use scissors or a file to make minor adjustments as needed. After adjustments, try the flipper again to ensure a comfortable fit. If further changes are necessary, repeat the process until it feels snug but not tight. Applying dental adhesive can help secure the flipper in place during use, providing additional stability and comfort.
Care and Maintenance
Caring for a dental flipper ensures its longevity and effectiveness. Proper maintenance contributes to oral hygiene and comfort during use.
Cleaning Your Dental Flipper
Cleaning a dental flipper occurs daily to prevent bacteria build-up. Rinse the flipper under lukewarm water after each use to remove food particles. Non-abrasive toothpaste works well for gentle brushing. Use a soft toothbrush to avoid scratching the surface. Soaking the flipper in a denture cleaner once a week can enhance freshness. Ensure to follow the manufacturer’s instructions when using cleaning solutions.
Storing Your Flipper Properly
Storing a dental flipper correctly minimizes damage. A dry, safe container keeps the flipper protected when not in use. Consider using a ventilated case for airflow to avoid moisture build-up. Placing the flipper in a cool, dry location prevents warping. Avoid using harsh chemicals or heat sources during storage, as these may distort the shape. Regular checks on the flipper will help maintain its condition.
Creating a dental flipper at home can be an empowering solution for those dealing with a missing tooth. With the right materials and a bit of creativity anyone can restore their smile temporarily while waiting for a more permanent fix.
Following the step-by-step guide ensures a comfortable fit and a polished look. Regular maintenance and proper care are essential for keeping the flipper effective and hygienic.
By taking the initiative to craft a dental flipper at home individuals can enhance their appearance and boost their confidence without breaking the bank. This DIY approach not only offers a quick fix but also provides a sense of control over one’s dental health.